To add fonts to your website, you need to use our built-in fonts library. It allows you to install any font you need, and currently, we support three main sources of fonts:
- Google Fonts
- Adobe Fonts (Typekit)
- Custom Fonts
So, to add fonts, follow these steps:
- Open your admin panel and locate the Dashboard tab, then open it.
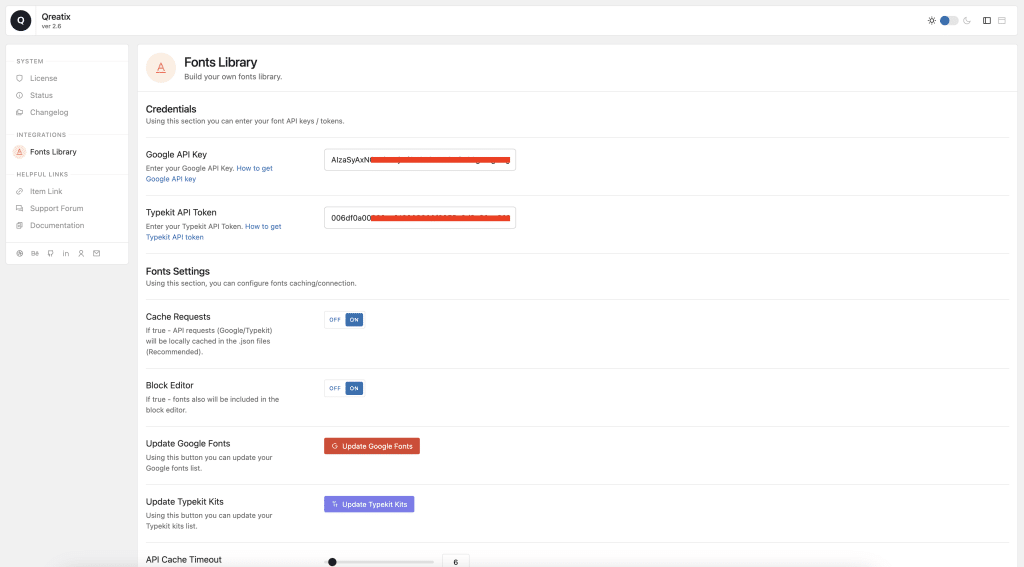
- In the sidebar, find the Fonts Library item.
- Depending on the fonts you need, you should either:
- Add a Google API Key (here’s a brief guide on how to obtain it)
- Or add a Typekit API Token (you can generate a user token on your API Token page on Typekit)
- After successfully adding API credentials, you can fine-tune the way fonts are connected and some global values, which you can learn about directly on the settings page.
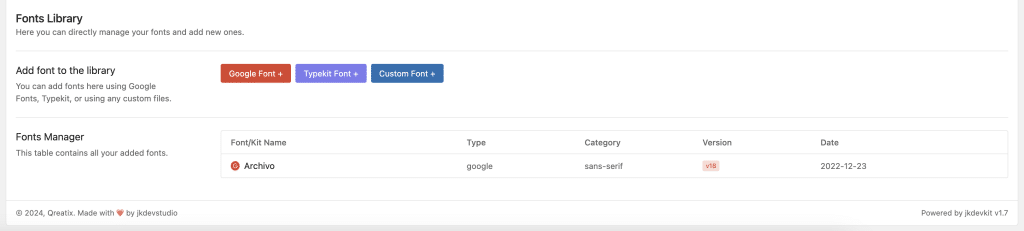
- After completing all necessary settings, scroll down the page and find the Fonts Library section. There, you will have a choice of 3 buttons, each corresponding to a different fonts source. Let’s consider separately Google/Typekit and Custom paths for adding fonts:
- If you chose the Google/Typekit source for adding a font, then after pressing the corresponding buttons, you will gain access to all the fonts in the Google library (if you press the Google button) and to all your kits (if you press the Typekit button). Here everything is quite straightforward, and using the available interface, you can search, sort, and filter fonts according to your own parameters.
- If you choose the Custom source for adding fonts, then after pressing the corresponding button, you will be presented with a form to add font variations. Here you need to enter all font attributes manually, such as name, display, font weight, style, and also add a font file to each variation. This is a slightly more complex process, so make sure you understand the principles on which fonts work before adding custom ones.
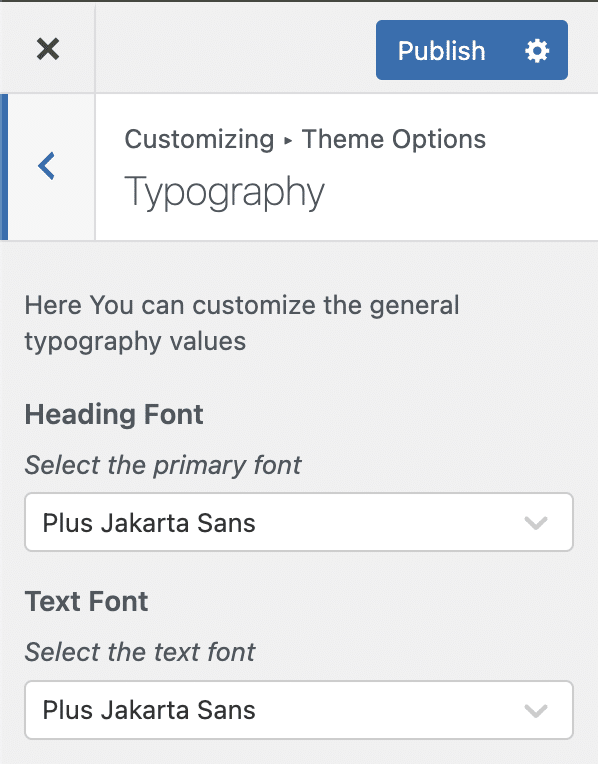
- As a result, by using your customizer, you can go to the Theme options -> Typography tab and select the necessary heading/text font there.