
Introduction
Hello! If you are reading this guide, it means you have most likely purchased one of our items on ThemeForest or CodeCanyon and are interested in how to activate them, as well as what activation is and why you need it.
As you probably know, Envato Marketplace provides you access to thousands of diverse premium digital items, including those in the WordPress Themes/Plugins category. To use them and have access to all the features and capabilities, you need to be well-informed about the licensing conditions of these items. Many authors may take a casual approach to this, but we respect the marketplace’s terms and strive to work within their rules in every possible way. Therefore, to begin with, we recommend that you familiarize yourself with the following articles from Envato regarding licenses and the differences between them:
- Licenses: https://help.market.envato.com/hc/en-us/sections/200616950-Licenses
- Buying and Item Support: https://help.market.envato.com/hc/en-us/categories/200216004-Buying-and-Item-Support
jkdevstudio activation
Having familiarized yourself with these rules, you’ve probably noticed that, for example, a Regular License allows you to use the product for a single application. This means that if you’ve purchased our theme and wish to use it on multiple websites, you will likely need to purchase multiple Regular Licenses. To facilitate control and convenient management of this process, as well as to maintain fair relations and transparency regarding this rule, we have created an activation system for our items.
What does it consist of?
Well, it’s quite simple. After purchasing an item and downloading it from the marketplace, each of our customers must confirm ownership of the item during its installation/activation on their domain. In other words, each purchase code must be linked to the corresponding domain where it is intended to be used, and this information is securely stored on our remote server, preventing any manipulation or falsification.
By activating the item, the customer guarantees compliance with the rule: 1 license = single application (excluding extended licenses). Additionally, they gain access to a range of bonus features (more on this a bit later).
The activation process
So, the activation process is identical for all our themes and plugins, so let’s delve into it in detail using one of our themes (Melady) as an example. First, make sure you have downloaded the theme/plugin and have installed it correctly in WordPress.
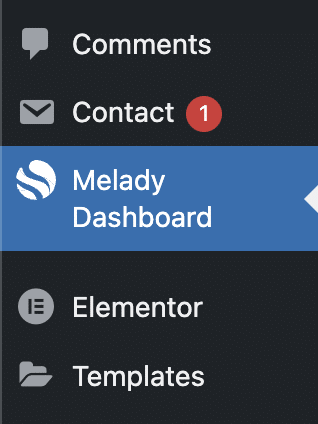
Item dashboard
If you’ve done that, you will immediately notice that your admin panel has gained an additional tab, which will be named “Item_name Dashboard.” In our case, it’s “Melady Dashboard.”
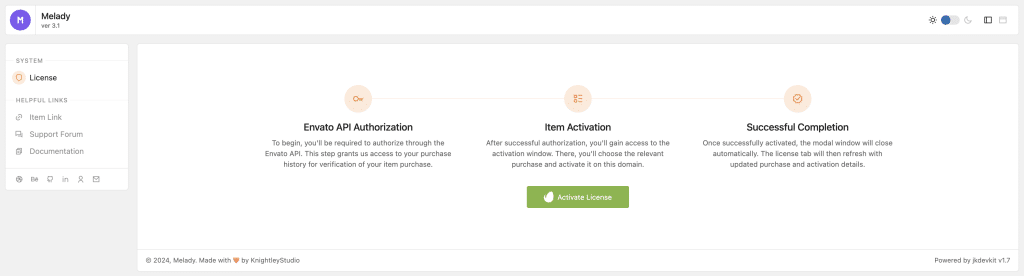
Activation prompt
After you navigate to this tab, you will encounter a section with a prompt to activate your item, featuring a large green button in the center. This button is what we need, so go ahead and click it!
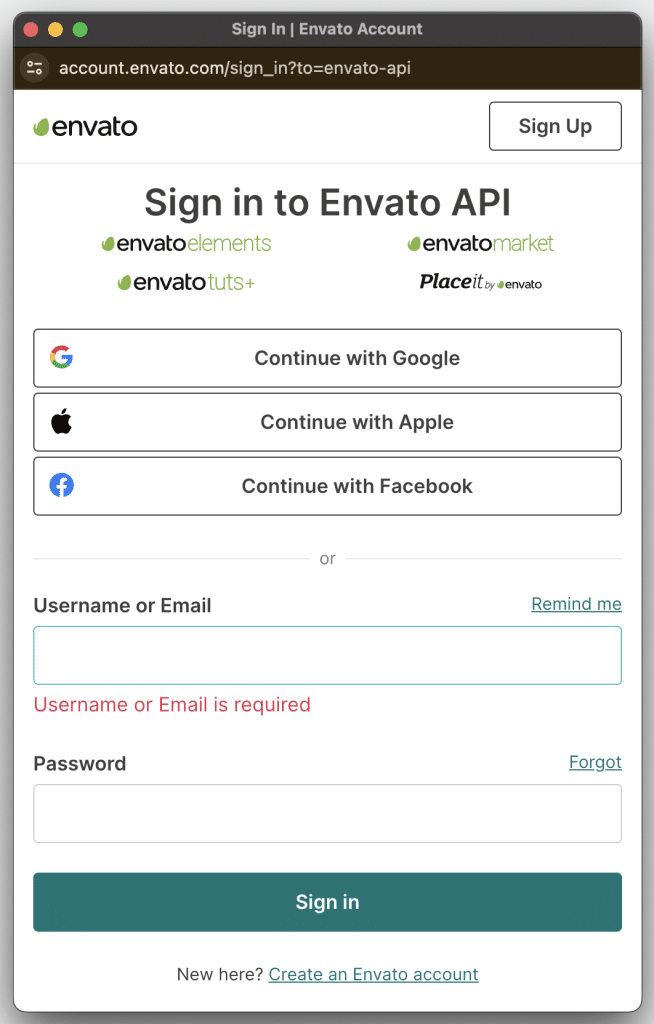
Envato authorization form
As a result of clicking the button, a pop-up window will appear in your browser above all other windows. In this window, you will see the Envato authorization form. It’s straightforward – you just need to login to Envato using your account credentials. Please ensure that you are using the account from which our theme/plugin was purchased.
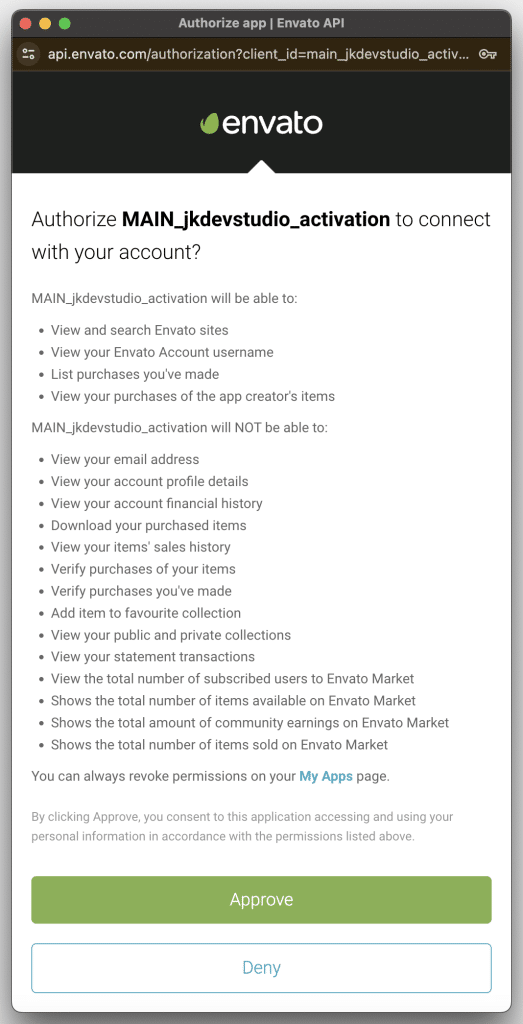
API access grant window
After successfully authorizing your Envato account, in the same window, you will be prompted to grant access to our Envato API application. Review the access terms and click “Approve.”
Disclaimer: This access does not provide us with any sensitive or private information about your account. It only allows us to view the items purchased directly from us.
Main activation window
After granting API access to process information from your account, the first step of account verification will begin. Specifically, it will confirm that there is at least 1 purchased copy of a current item on your account.
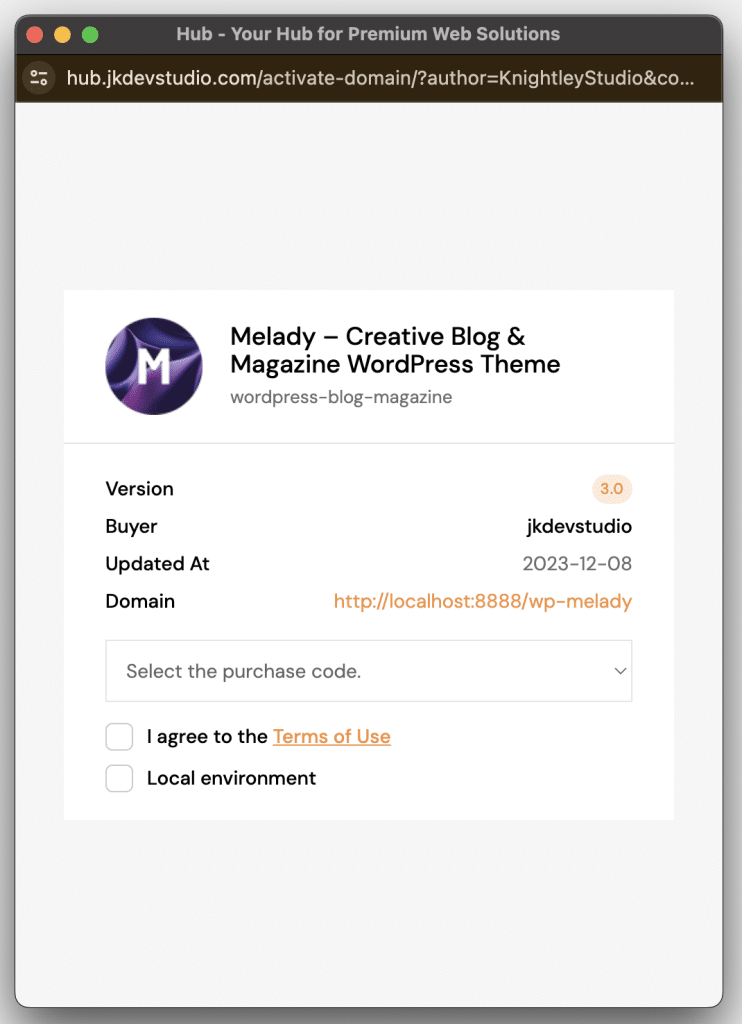
- In this window, you will find partial information about the current product, including its name, category, and version.
- Next to the item information, you can see details about your activation, including your account name and the current domain.
- Within the dynamic area of this window, there are a few checkboxes that can be clicked, as well as a purchase selector.
- The checkbox “I agree to the Terms of Use” is mandatory to check, as it confirms that you have read and understood all the licensing rules before activating the item.
- The “Local Environment” checkbox allows you to activate the theme/plugin on a local environment without using up an activation limit. You can have up to 5 such local activations, which allows you to thoroughly test and verify the item before deploying it live. However, please note that your local domain must include the word “localhost” as a requirement for local activation.
- The purchases selector allows you to choose a specific purchase code that you want to activate on the current domain. It will be available if you have 2 or more Regular Licenses for the current item (excluding Extended License).
Purchase code activation
Upon checking the “agreed to terms” checkbox and selecting the desired purchase code, the window will proceed to the second step of verification. This step involves verifying whether this purchase code has been activated previously and whether it is already linked to any domains. During this verification, there are two possible outcomes:
- Outcome 1: The verification is successful, with no currently linked domains found for this purchase code.
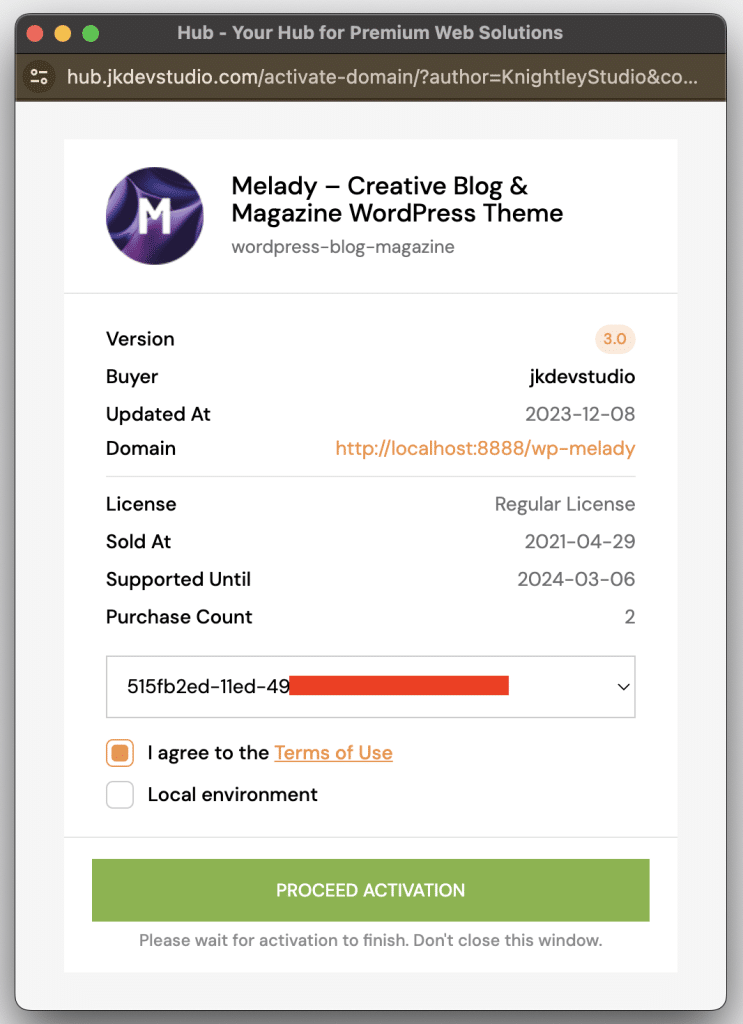
- Outcome 2: The verification fails because this purchase code has already been activated. To proceed, you will either need to purchase an additional license or deactivate the previous domain (details on how to do this will be described in the deactivation section).

Possible errors
During the activation process, you may encounter a number of errors, each of which has clearly declared reasons. Let’s consider all possible errors that you may encounter:
- “Your number of activations has exceeded the allowed limit. Please contact support for assistance” – This error means that you are reactivating your purchase code too frequently (i.e., attaching it to a domain and detaching it). In reality, the limit for such attempts is quite high and resets over time, but in the short term, it looks suspicious. Therefore, if you do receive such an error, we recommend that you contact our support to resolve any possible misunderstandings.
- “Your number of local server activations has exceeded the limit. Please contact support for assistance” – This is a similar error to the previous one, but it simply indicates that you have activated too many local domains (the maximum number of such simultaneous activations is 5 local domains). If you individually need more local activations, please contact our support and I am confident we can find a solution to this problem.
- “This domain has been blocked. For clarification on the reasons for the block and additional information, please contact support” – If you are an honest user and follow all the rules, you will never see such a message 🙂
- “This purchase key has already been activated. Please deactivate it or contact support” – This error indicates that your purchase code has already been activated on another domain. In this case, you will need to deactivate it or purchase a new license.
- “This domain is not activated” – This error indicates that you are trying to activate a domain with a key that is already activated on another domain. Therefore, in this case, you need to deactivate the old domain or contact our support if you have additional questions regarding this.
- “This purchase code is invalid. Please double-check the input accuracy and refer to the [link] article for guidance” – Receiving such an error most likely means that you have edited or made some changes to the original code of our theme or the jkdevkit plugin. We do not recommend doing this directly; it’s better to use a child theme/filters instead. However, if you have encountered such an error, please contact our support.
Activated dashboard
Let’s assume that your purchase code is clean and has not been activated on any domain yet, or you have successfully detached it from a previous domain (in which case, you probably already know how activation works 😂). In this case, after clicking the activation button, within literally 2-3 seconds, this window will be closed, and your Item Dashboard will be updated to display the current information about the domain and license. Additionally, as you can notice, there will be additional tabs (which are unique to each individual item) and two buttons, “Deactivate License” and “Copy to Clipboard“
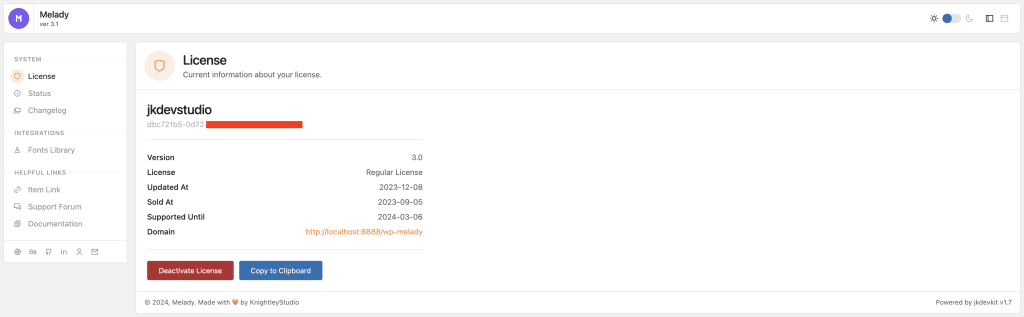
License section buttons
After activating your domain, you will have access to 2 buttons, each important in its own way. So let’s take a closer look at them:
- Deactivate License – this button triggers the deactivation popup, you can learn more about this in the next section that describes the domain deactivation process.
- Copy to Clipboard – this button copies to your clipboard a JSON with information about your activation and license. You can use this JSON to attach it to your support ticket if you need help with activation, or if for some reason you don’t have access to your website and can’t access your Envato account. This serves as an additional backup in case of loss of other data, so, we advise you to save this somewhere separately.
The deactivation process
If you need to transfer your activation from one domain to another, you may find it useful to know how to properly detach your purchase code from the domain it is activated on. There are 3 main methods to do this, and we will go through each one in detail:
1st method
If you have access to your active domain, you can simply open your Item Dashboard and find the Deactivate License button there. Clicking it will open a new tab in your browser on top of all others with a prompt for Envato authorization (similar to the activation process). After successful authorization, you will be asked to grant access to another API application, but this time the API application will be used to deactivate the domain. After granting access, a final window will appear where you can verify the information about your domain and click the “Proceed Deactivation” button. After a few seconds, your domain will be detached.

2nd method
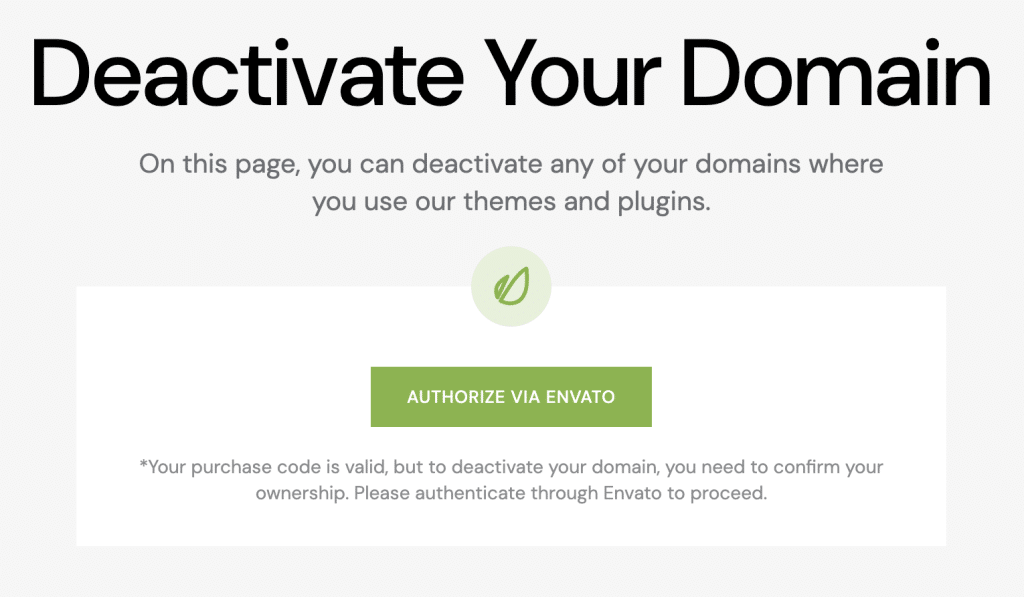
The second method can be used if for some reason you don’t like the first one or you no longer have access to your website. This method is remote deactivation through our website. For this, you only need to know your purchase code. So, just go to the following link, enter your purchase code in the provided field
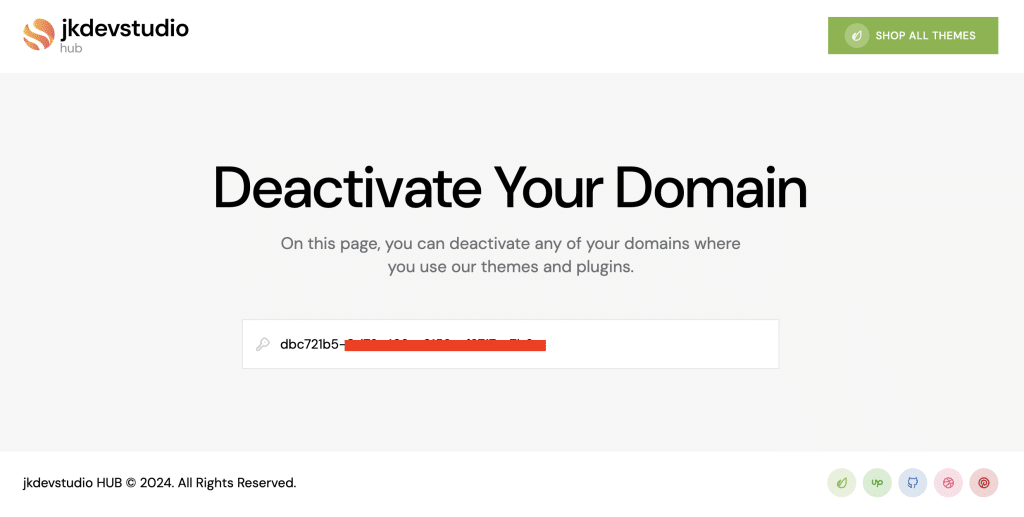
complete the Envato Authorization and grant access to the API
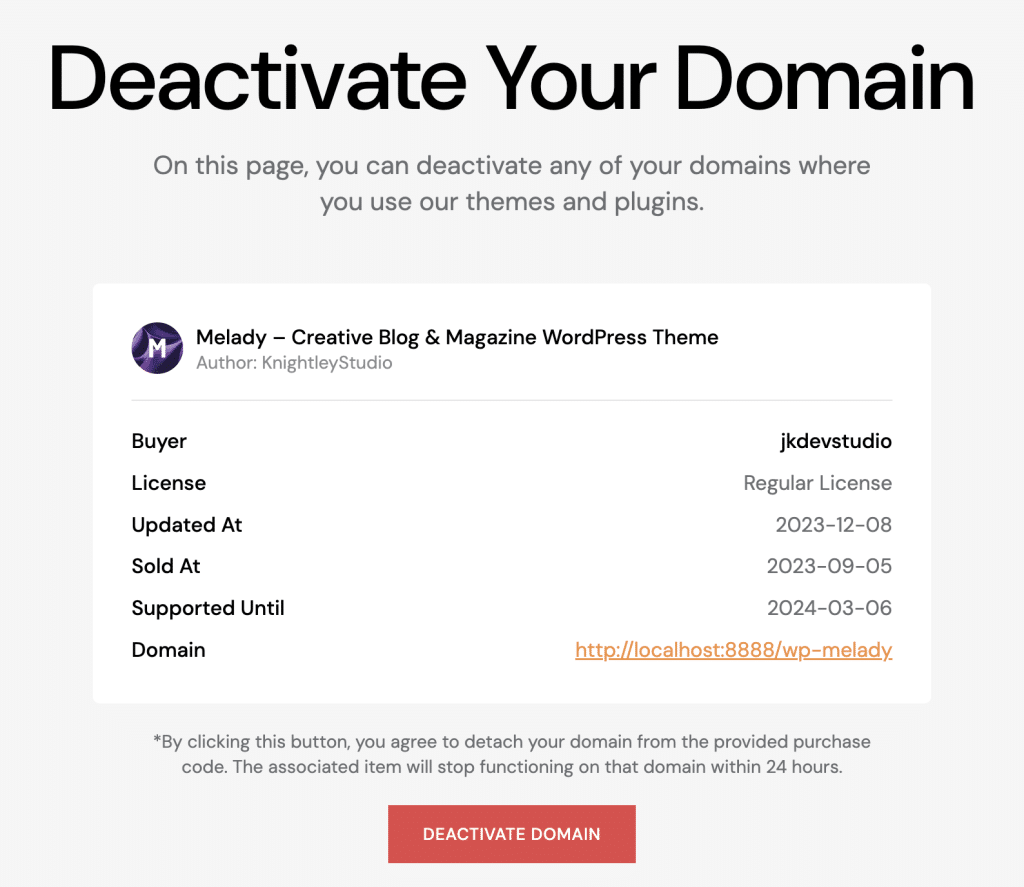
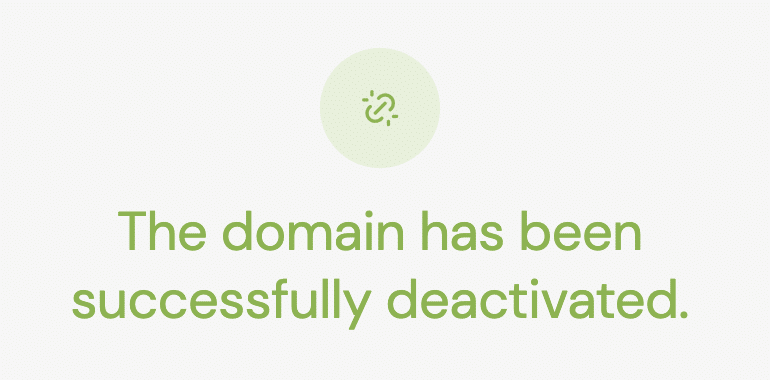
after which you will receive information about the activated domain and will be able to detach it with one click.
3rd method
In case you have lost access to your domain, Envato account, and also don’t have the purchase code, you can seek help from our support by providing some minimal evidence of your license, and we can assist you in reactivating it on a new domain.
Useful Information & Tips
This section is optional and covers some useful knowledge about the activation process and how to utilize its benefits.
Automatic Activation
Suppose you activated your domain, but then performed a wp reset, or cleared your database, and after that, you might think that you need to activate it again, but actually, you don’t. Once you re-enter your wp admin and re-activate jkdevkit, it will see that your domain is on the list of activated domains on our server and will automatically activate it on your domain again. So, you will immediately see the License tab and regain all the privileges you had before.